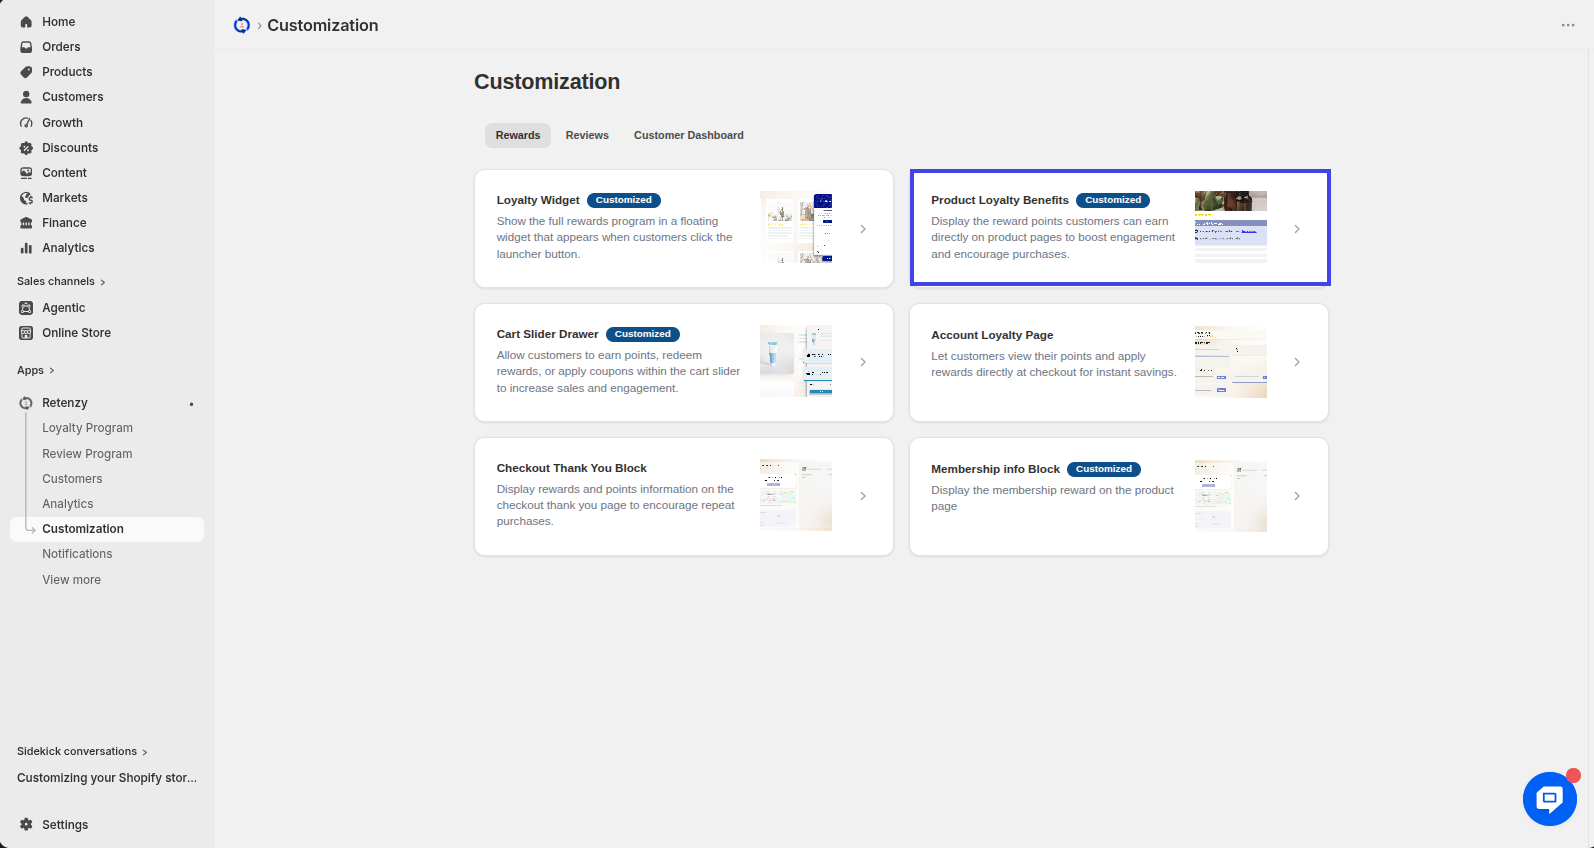
The Product Page Reward Widget shows customers how many points they can earn or redeem directly on a product page. This motivates purchases by highlighting rewards upfront.
Steps-by-Step:
Step 1: Open the Retenzy Dashboard
- Log in to your Retenzy dashboard to access your store settings.
Step 2: Navigate to the Customization
- From the dashboard, click on Customization
Step 3: Open the Rewards Section
- In the Customization page, navigate to the Rewards section.
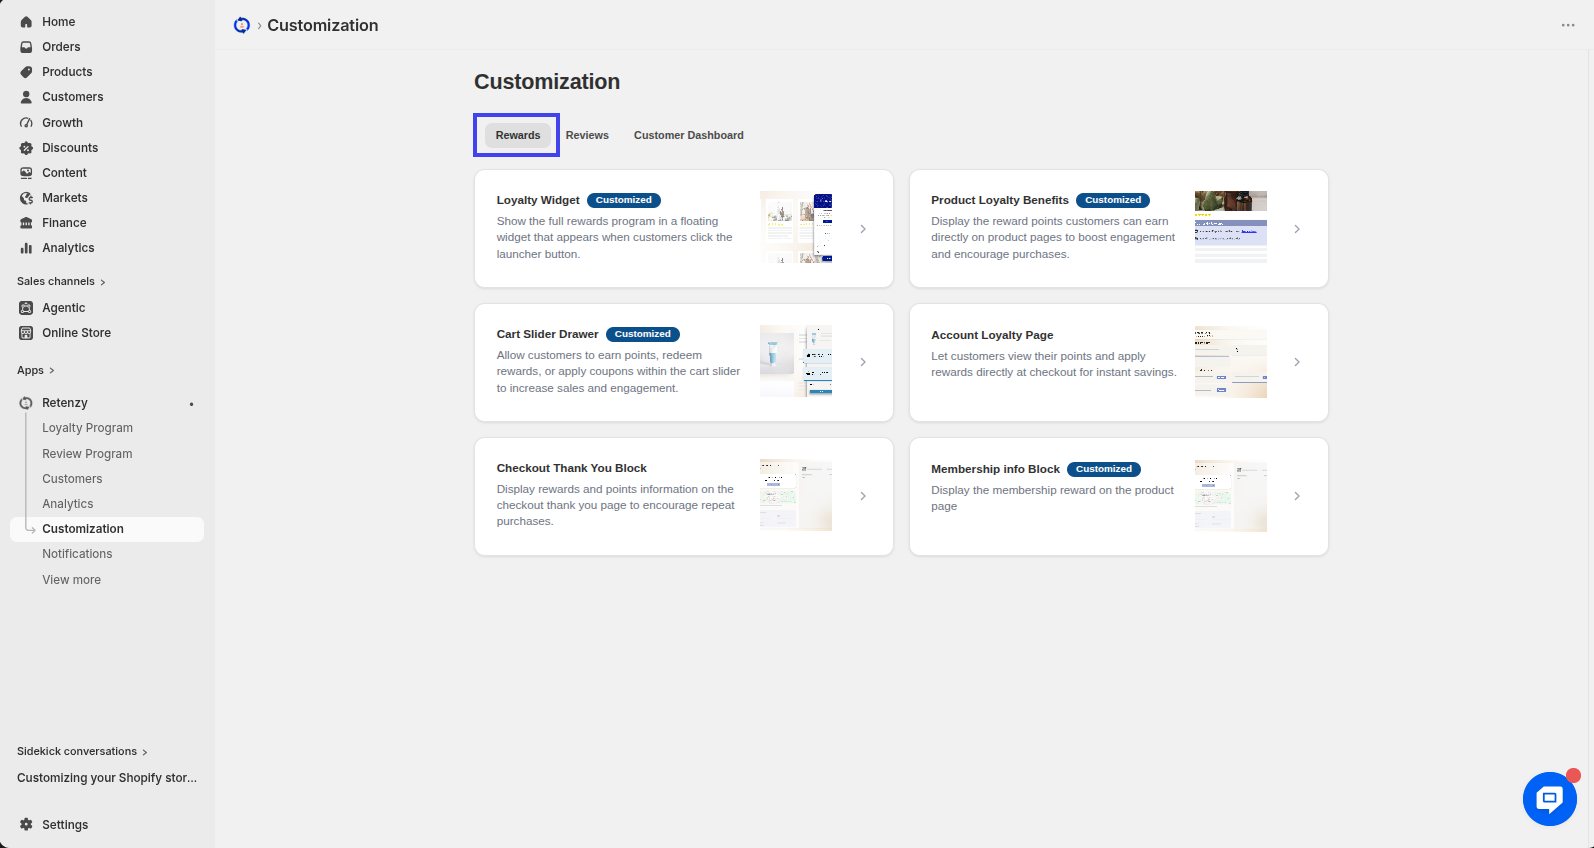
Step 4: Open the Product Review Block
- Within the Rewards section, click on the Product Loyalty Benefits
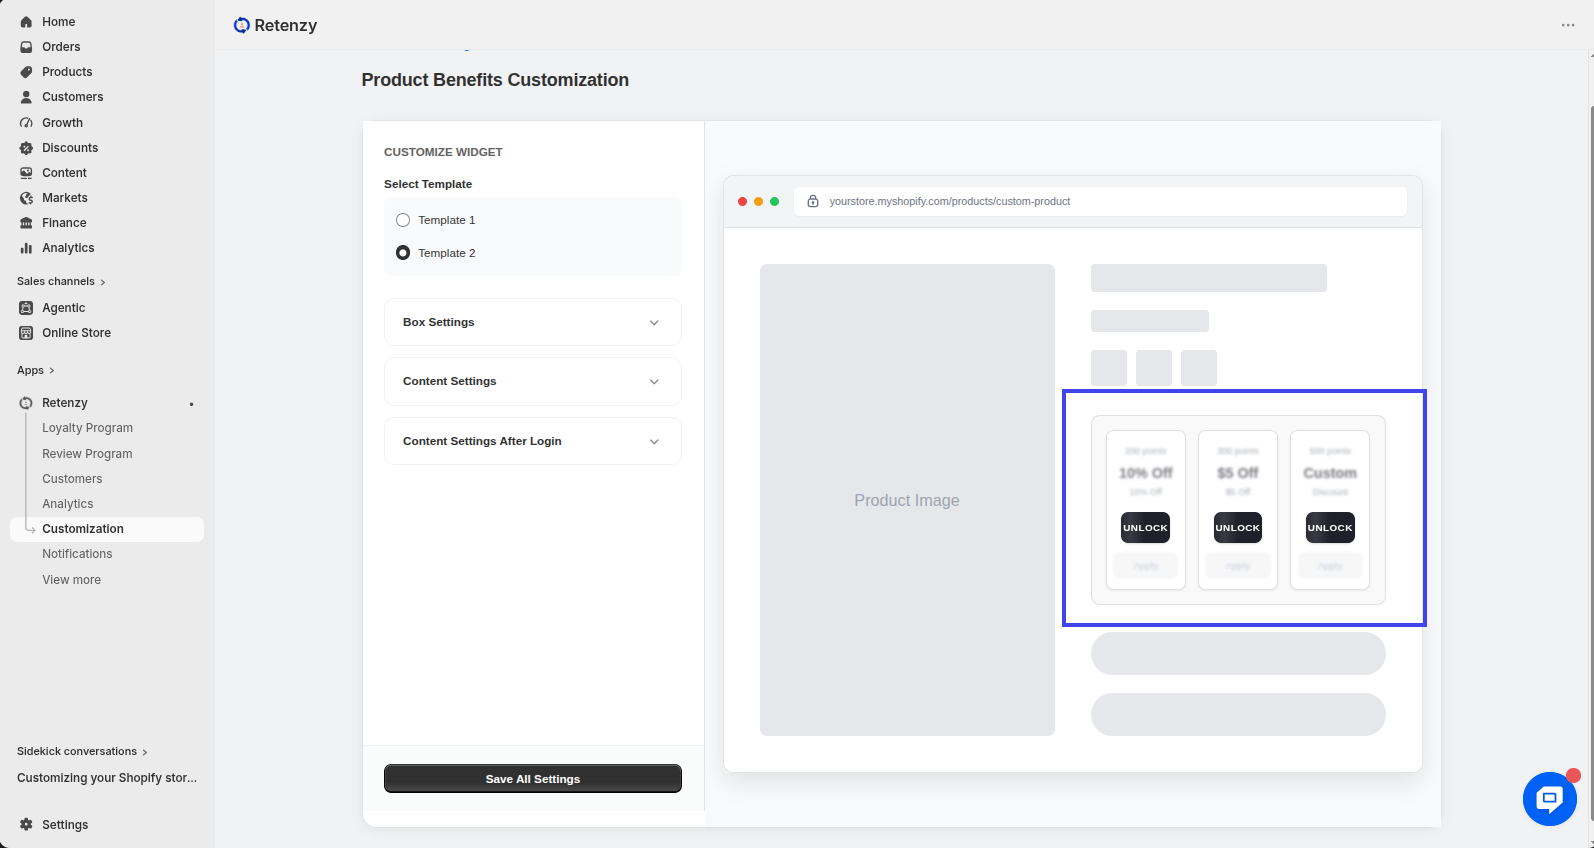
Step 5: Choose a Product Benefits Template
In the Product Benefits section, you will see two template options. Select the template that best fits your store.
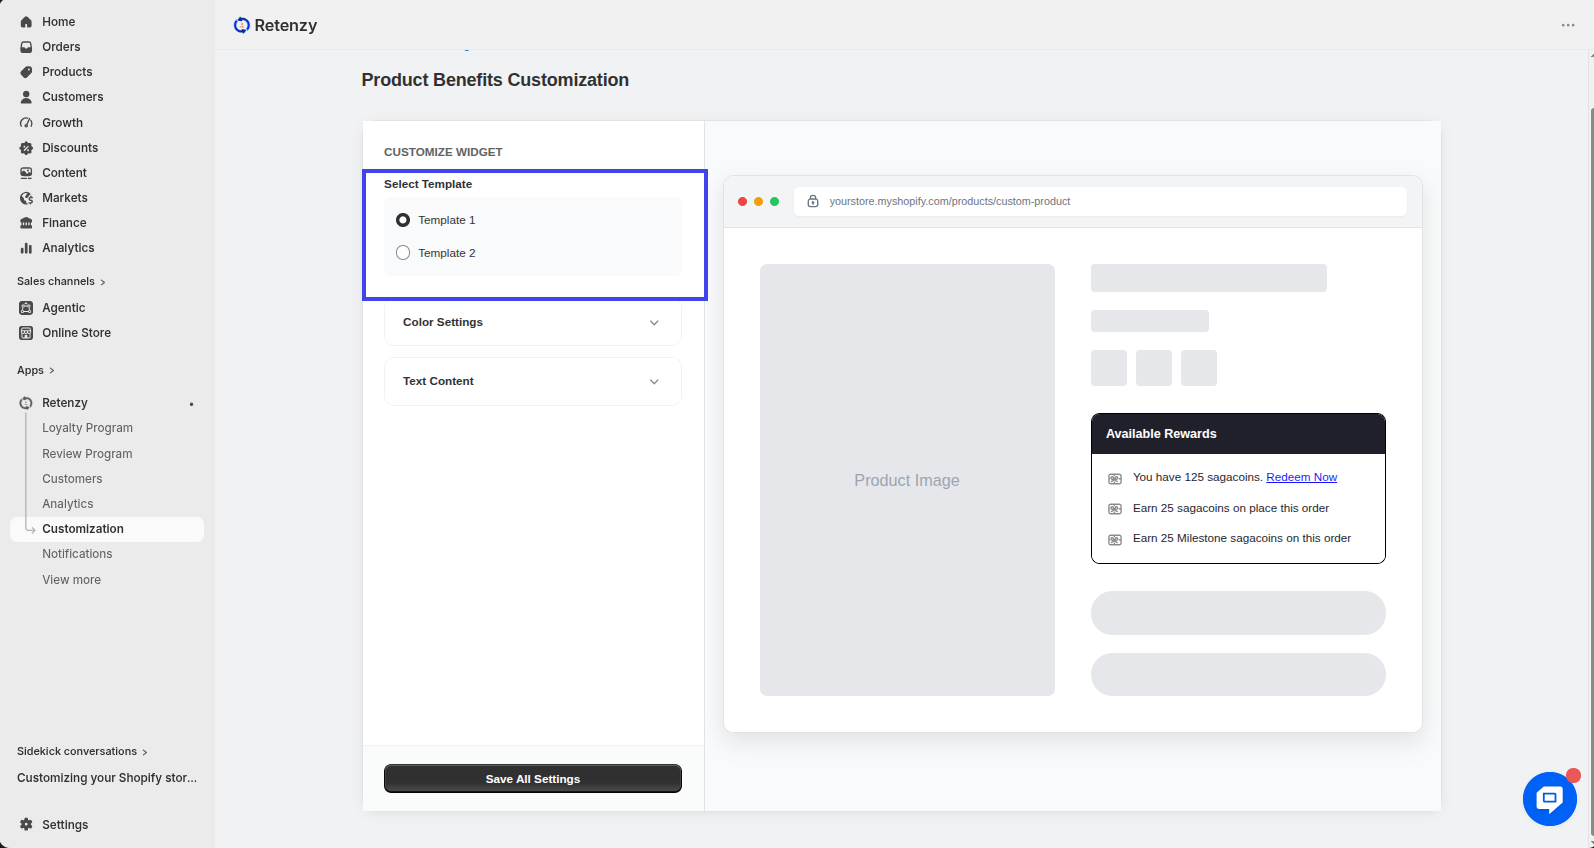
Step 6: Customize Template 1
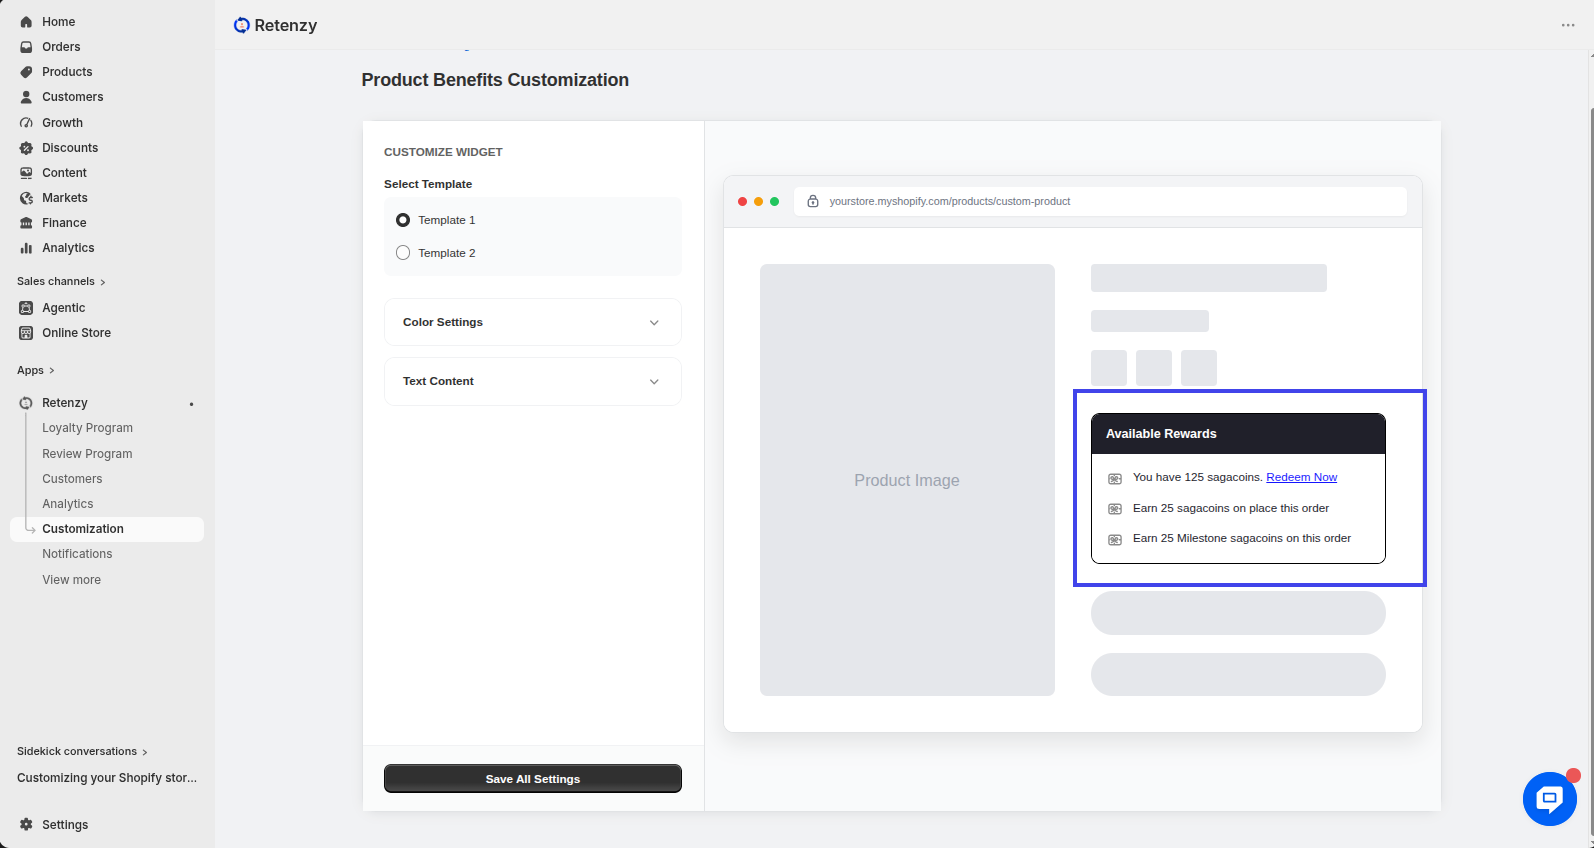
Template 1 displays your customer's available points and earning information, as shown in the preview,
for example:
-
You have 125 coins. Redeem Now
-
Earn 25 coins on placing this order
-
Earn 25 Milestone coins on this order
You can customize the appearance of Template 1 by adjusting its colors, border radius, and text content.
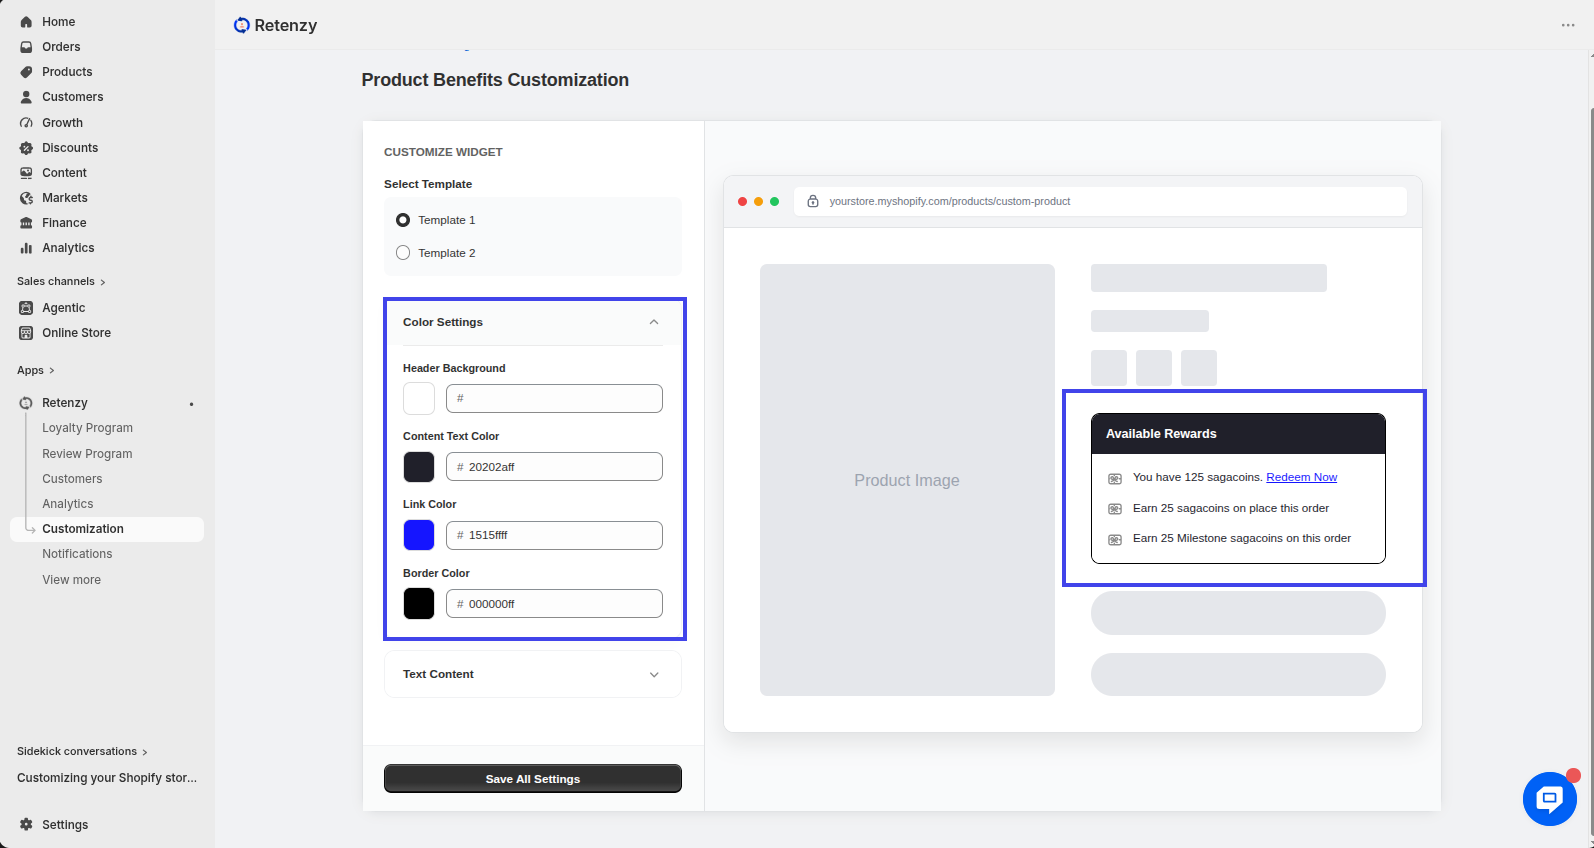
Step 7: Customize the Color Settings
In the Color Settings section, you can customize the following:
-
Header Background
-
Content Text Color
-
Link Color
-
Border Color
Choose colors that match your store's branding.
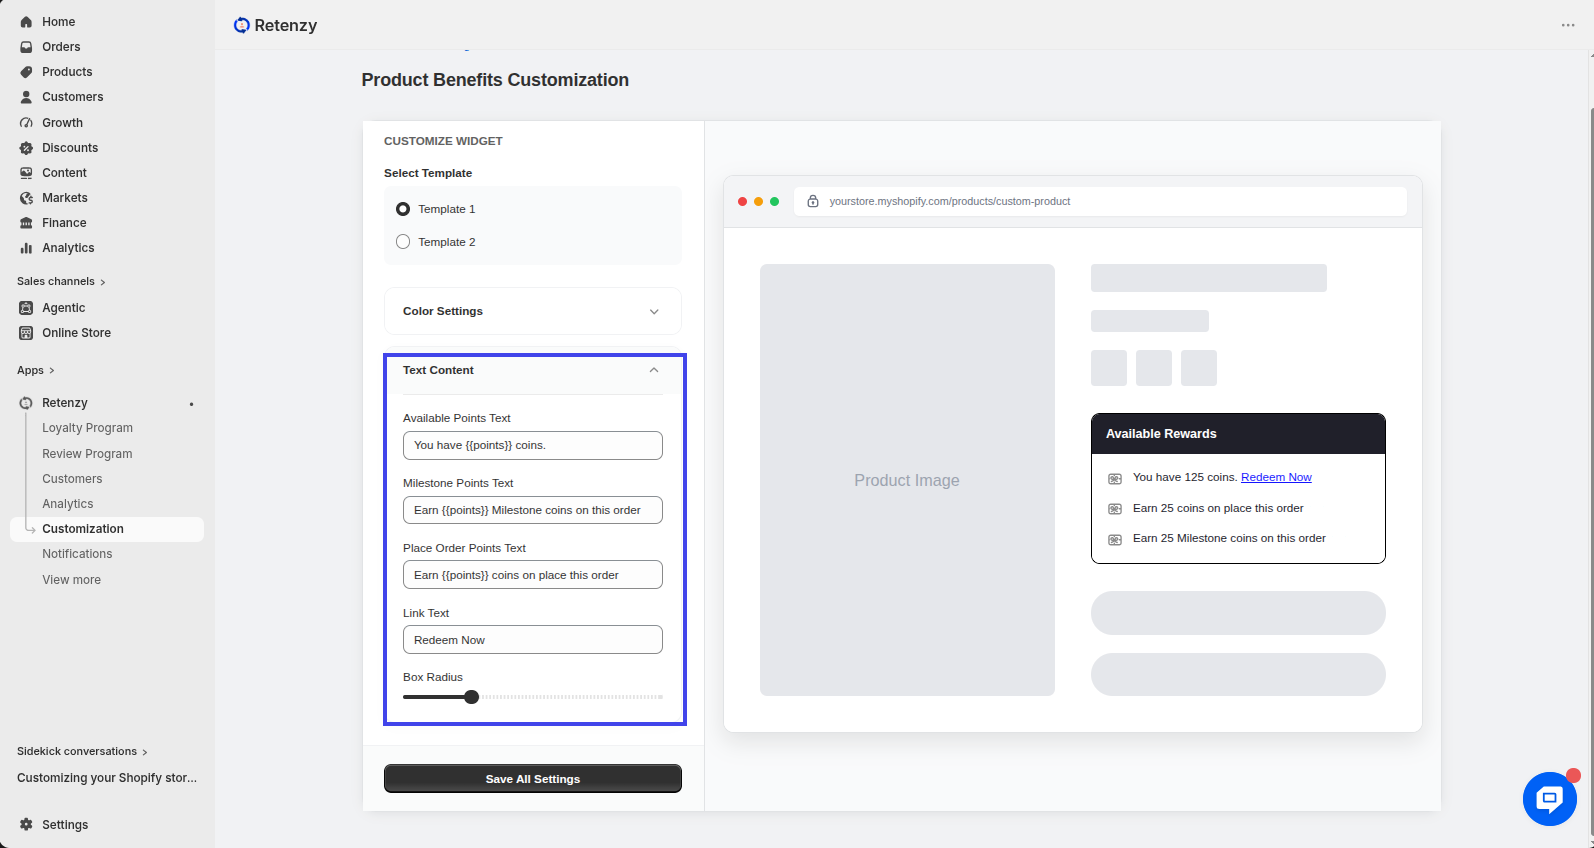
Step 8: Customize the Text Content
In the Text Content section, you can edit the following text fields:
-
Available Points Text
Example: You have {{points}} coins. -
Milestone Points Text
Example: Earn {{points}} Milestone coins on this order. -
Place Order Points Text
Example: Earn {{points}} coins on placing this order. -
Link Text
Update the text to match your store's preferred messaging.
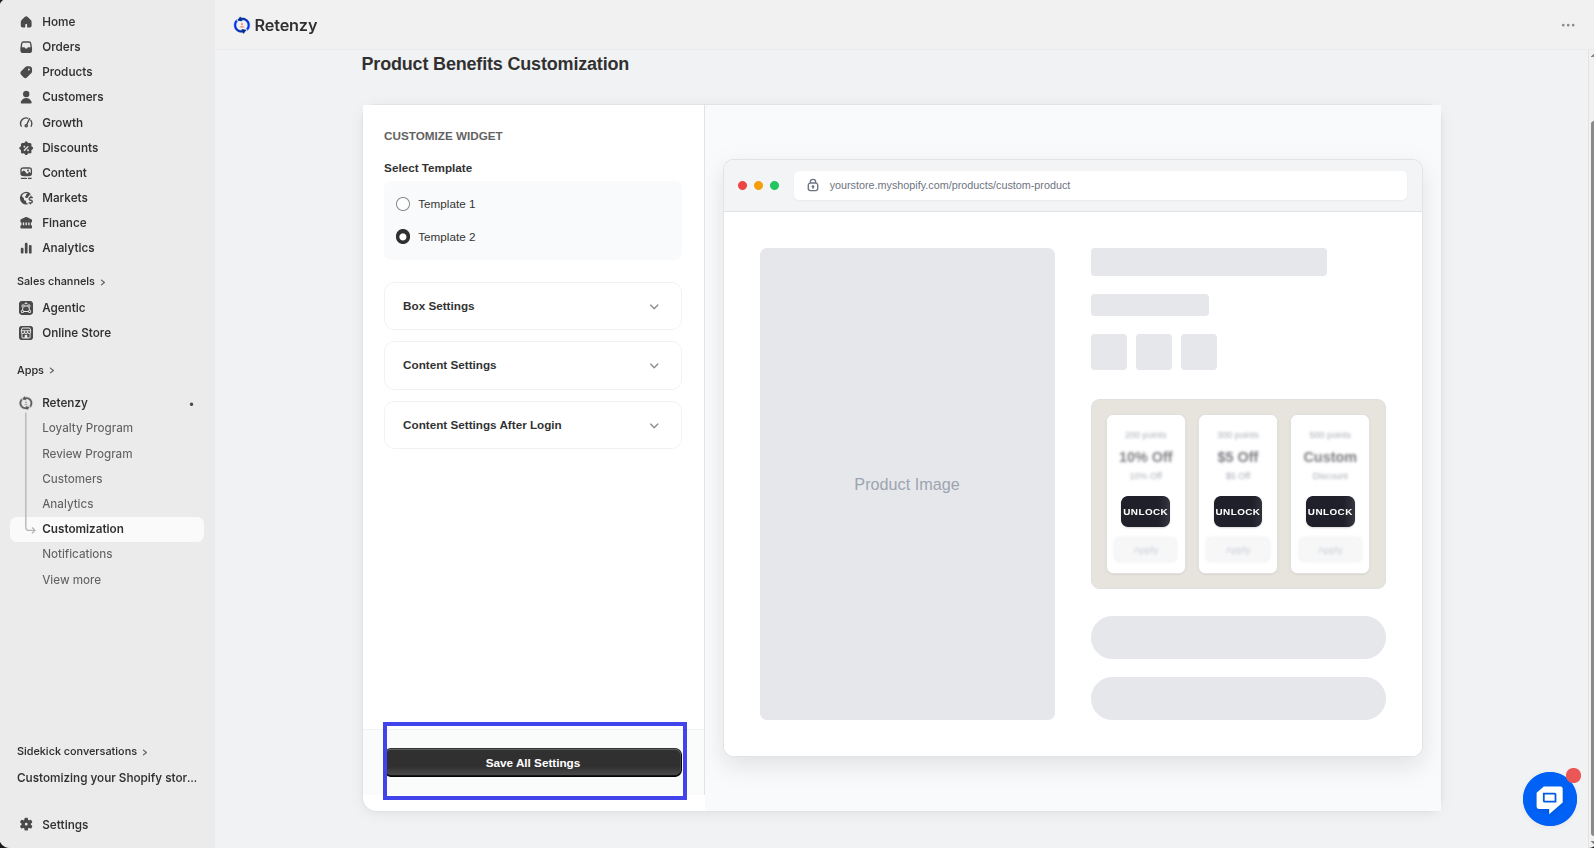
Step 9: Customize Template 2
Template 2 displays exclusive product offers that customers can unlock after logging in, such as 5% or 10% discounts.
You can customize this template by editing the Box Settings, Content Settings, and Content Settings After Login.
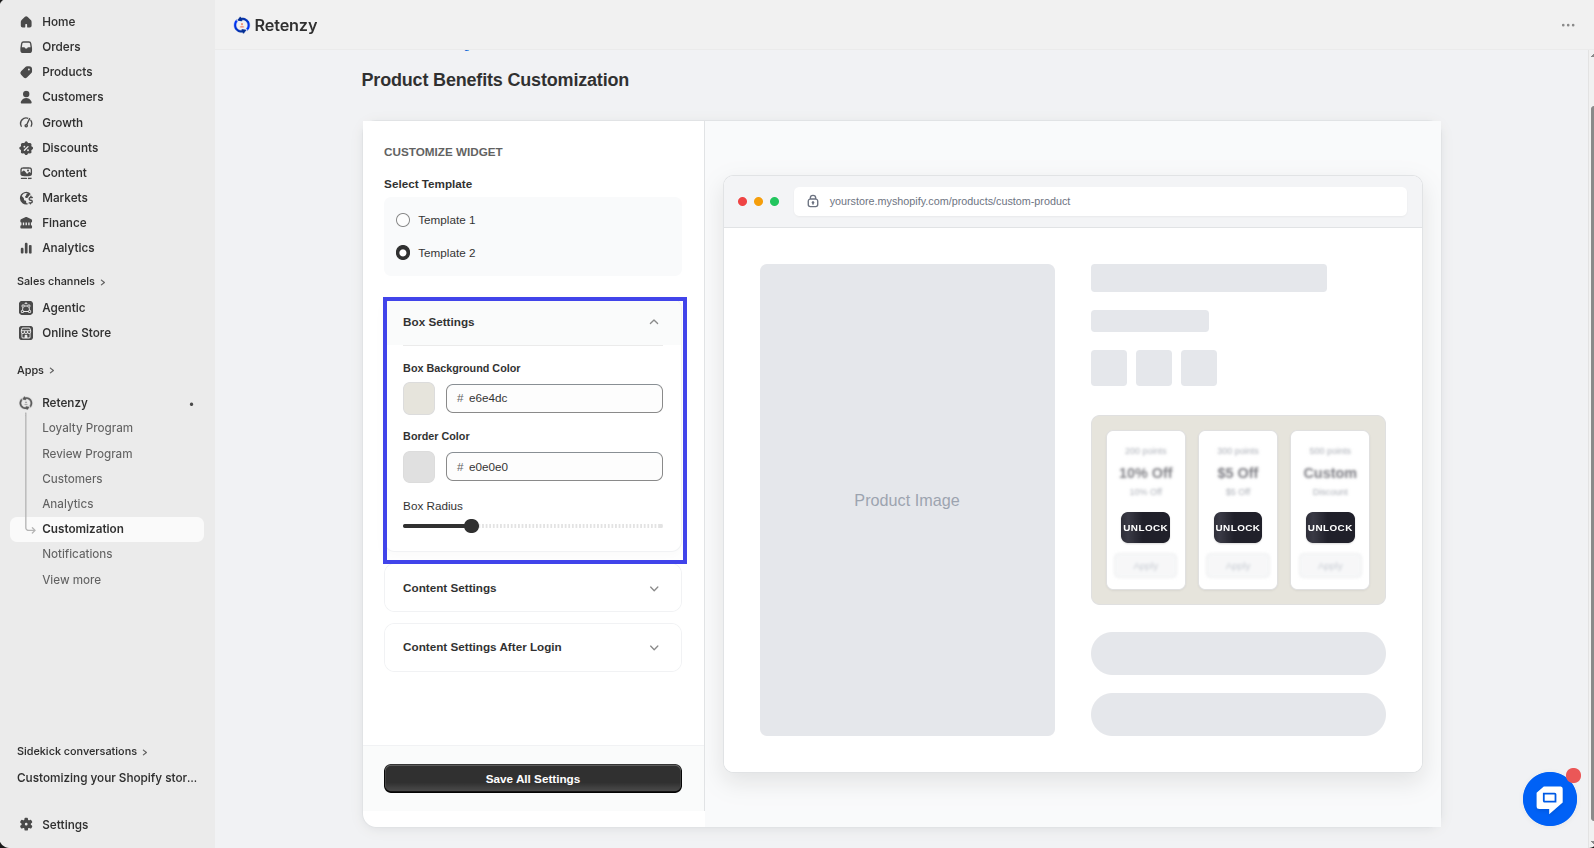
Step 10: Customize the Box Settings
In the Box Settings section, you can customize the appearance of Template 2, including:
-
Box colors
-
Border radius
Adjust these settings to match your store's design.
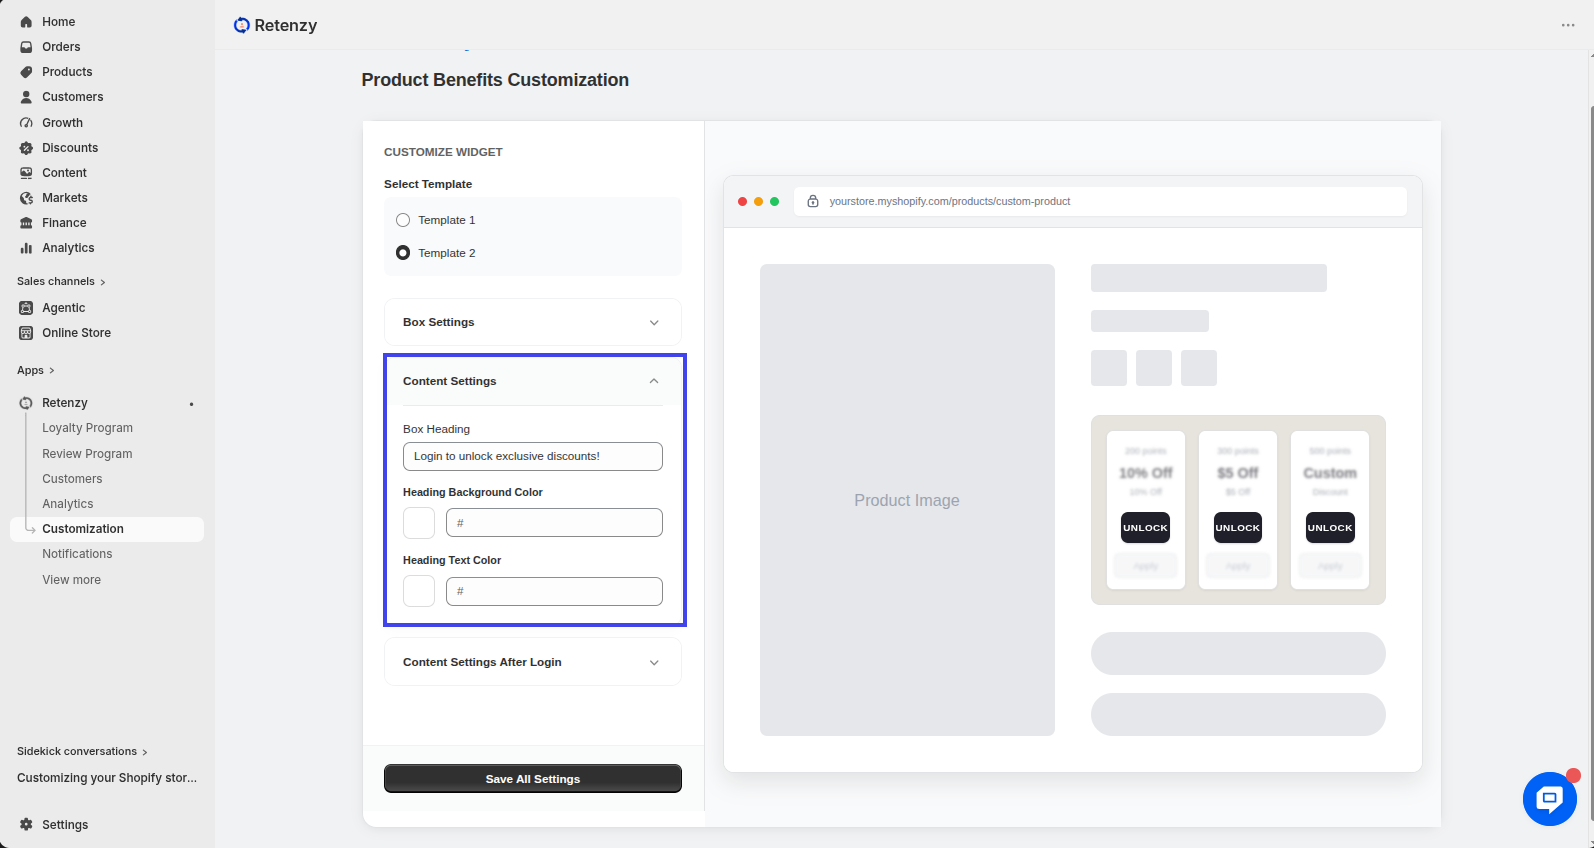
Step 11: Customize the Content Settings
In the Content Settings section, you can edit:
-
Box Heading
Example: Login to unlock exclusive discounts! -
Heading Background Color
-
Heading Text Color
Customize the content and colors as needed.
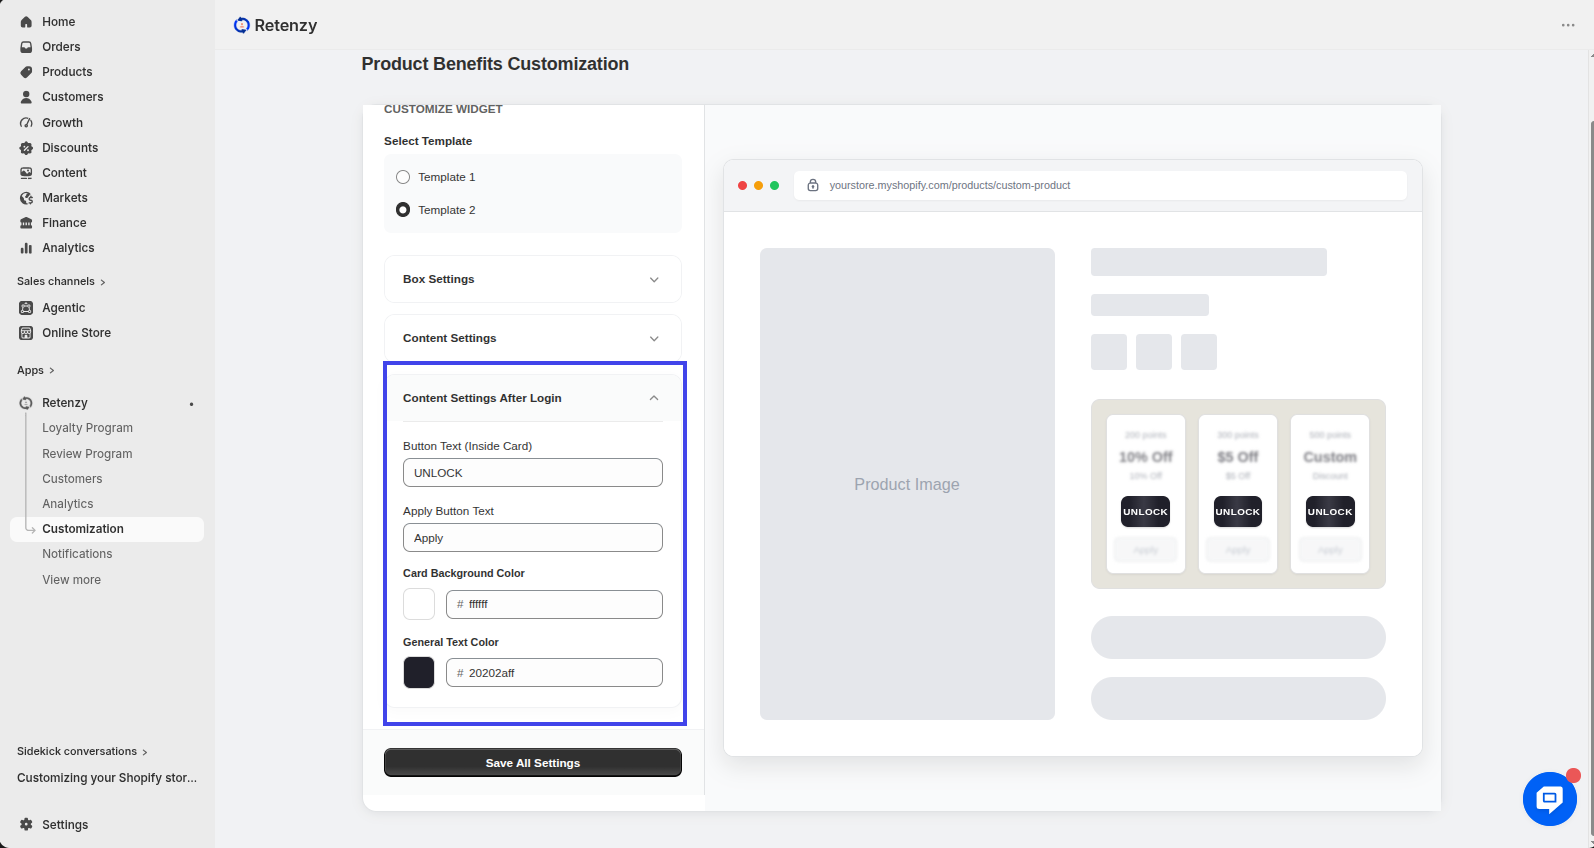
Step 12: Customize the Content After Login
In the Content Settings After Login section, you can customize what customers see after they log in, including:
-
Button Text (Inside Card)
-
Apply Button Text
-
Card Background Color
-
General Text Color
Modify these settings to create the experience you want after customer login.
Step 13: Save All Settings
Once you have finished customizing the Product Benefits section, click Save All Settings to save and apply your changes.