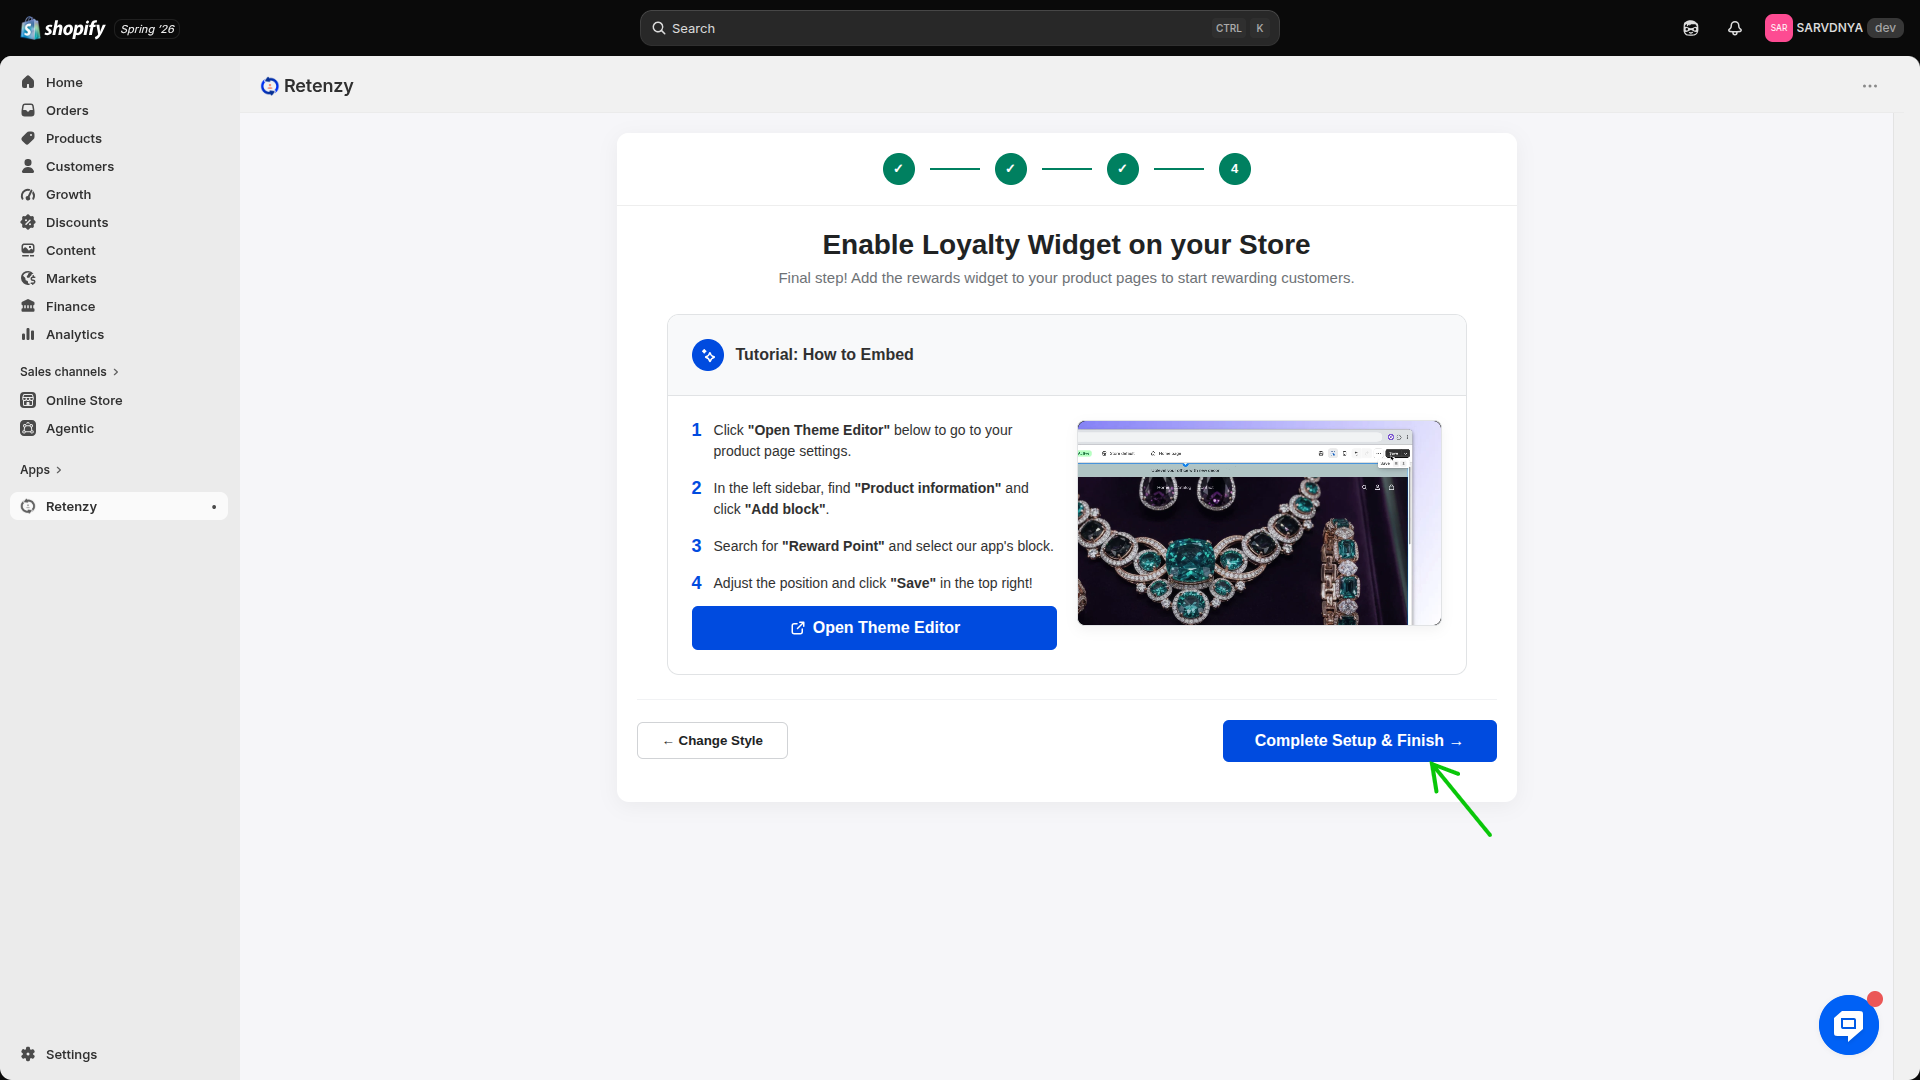
Set Up Retenzy Manually
Follow the steps below to manually configure Retenzy and complete the onboarding process.
Step 1: Start the Manual Setup
-
Open the Retenzy App.
-
Click Continue to Set Up Manually to begin the onboarding process.
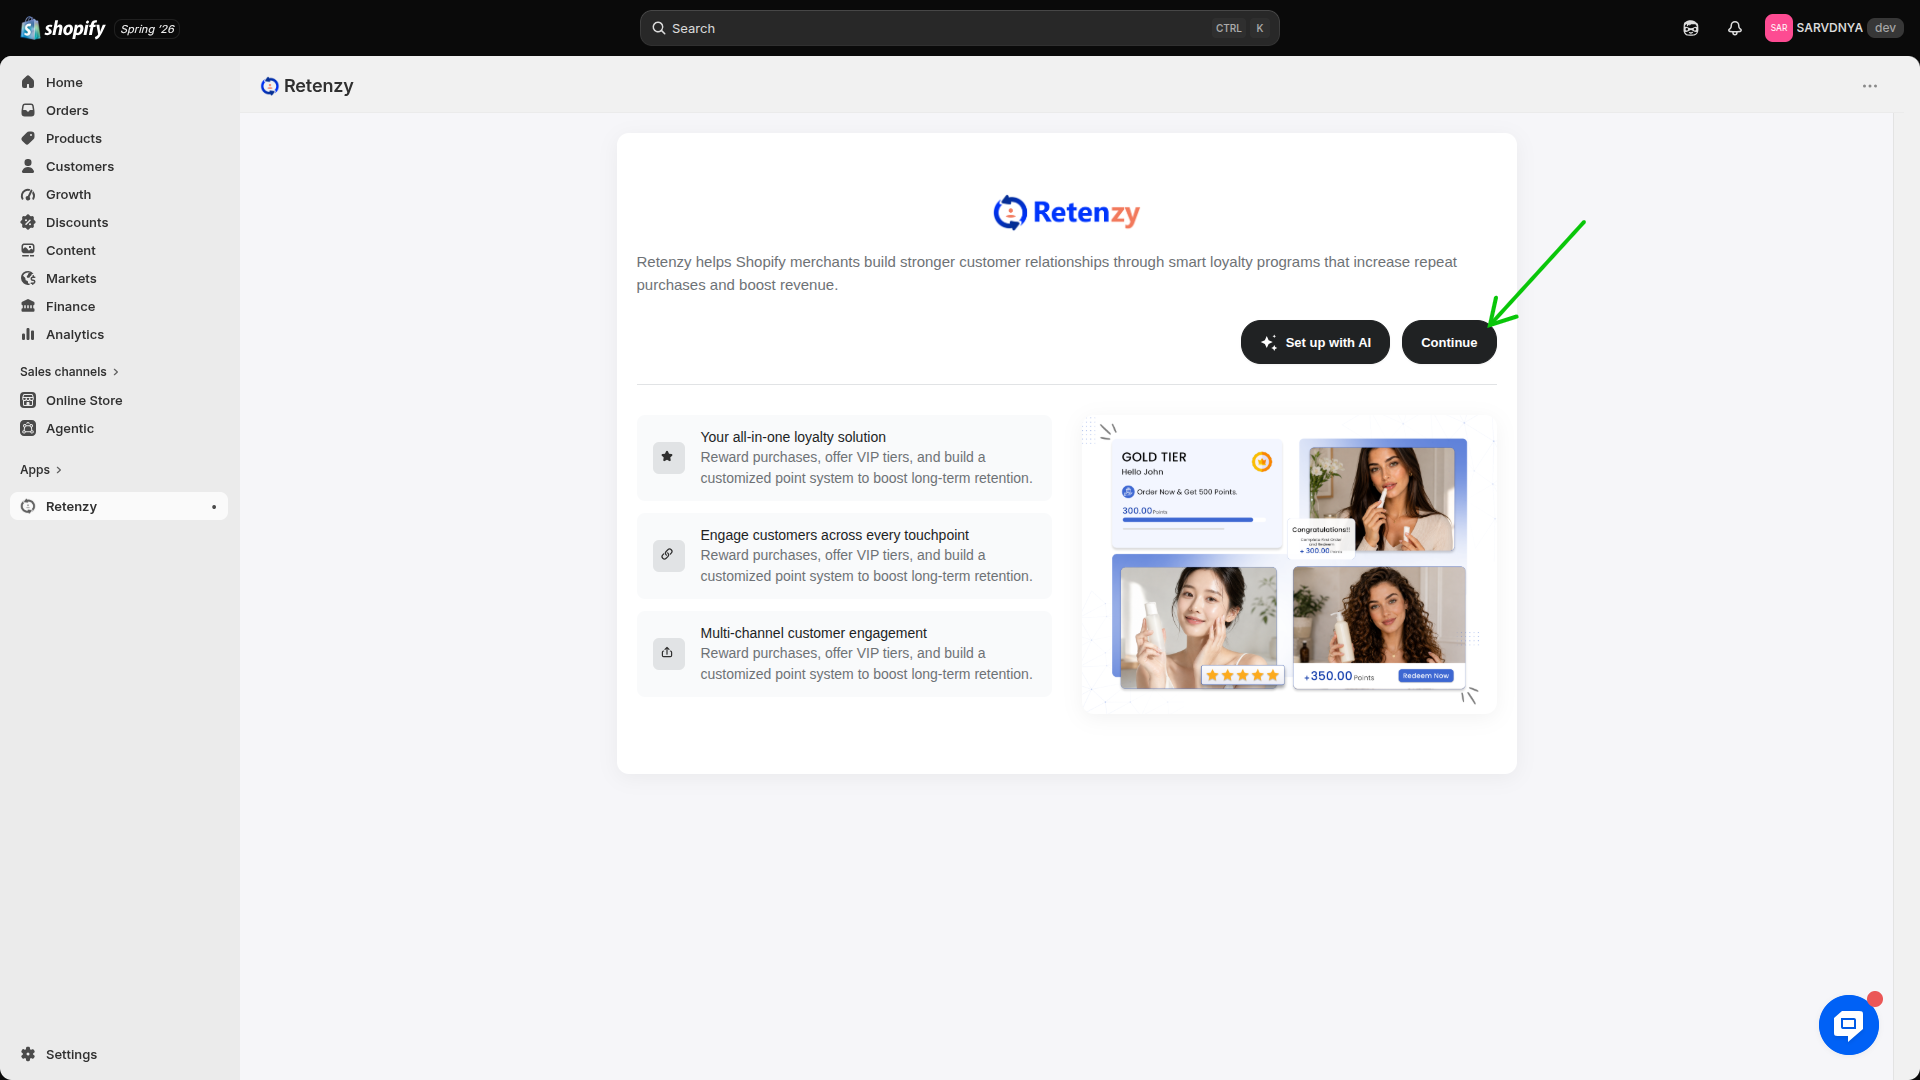
Step 2: Configure the Basic Program
On the Basic Program Configuration page, configure your default loyalty program settings.
Set the following values:
Place an Order
Configure the number of points customers earn for every purchase.
Example:
-
5 Points for every $1 spent.
Ways to Redeem
Configure how customers can redeem their loyalty points.
Example:
-
10% Off for 100 Points.
After completing the basic program configuration, click Next Step.
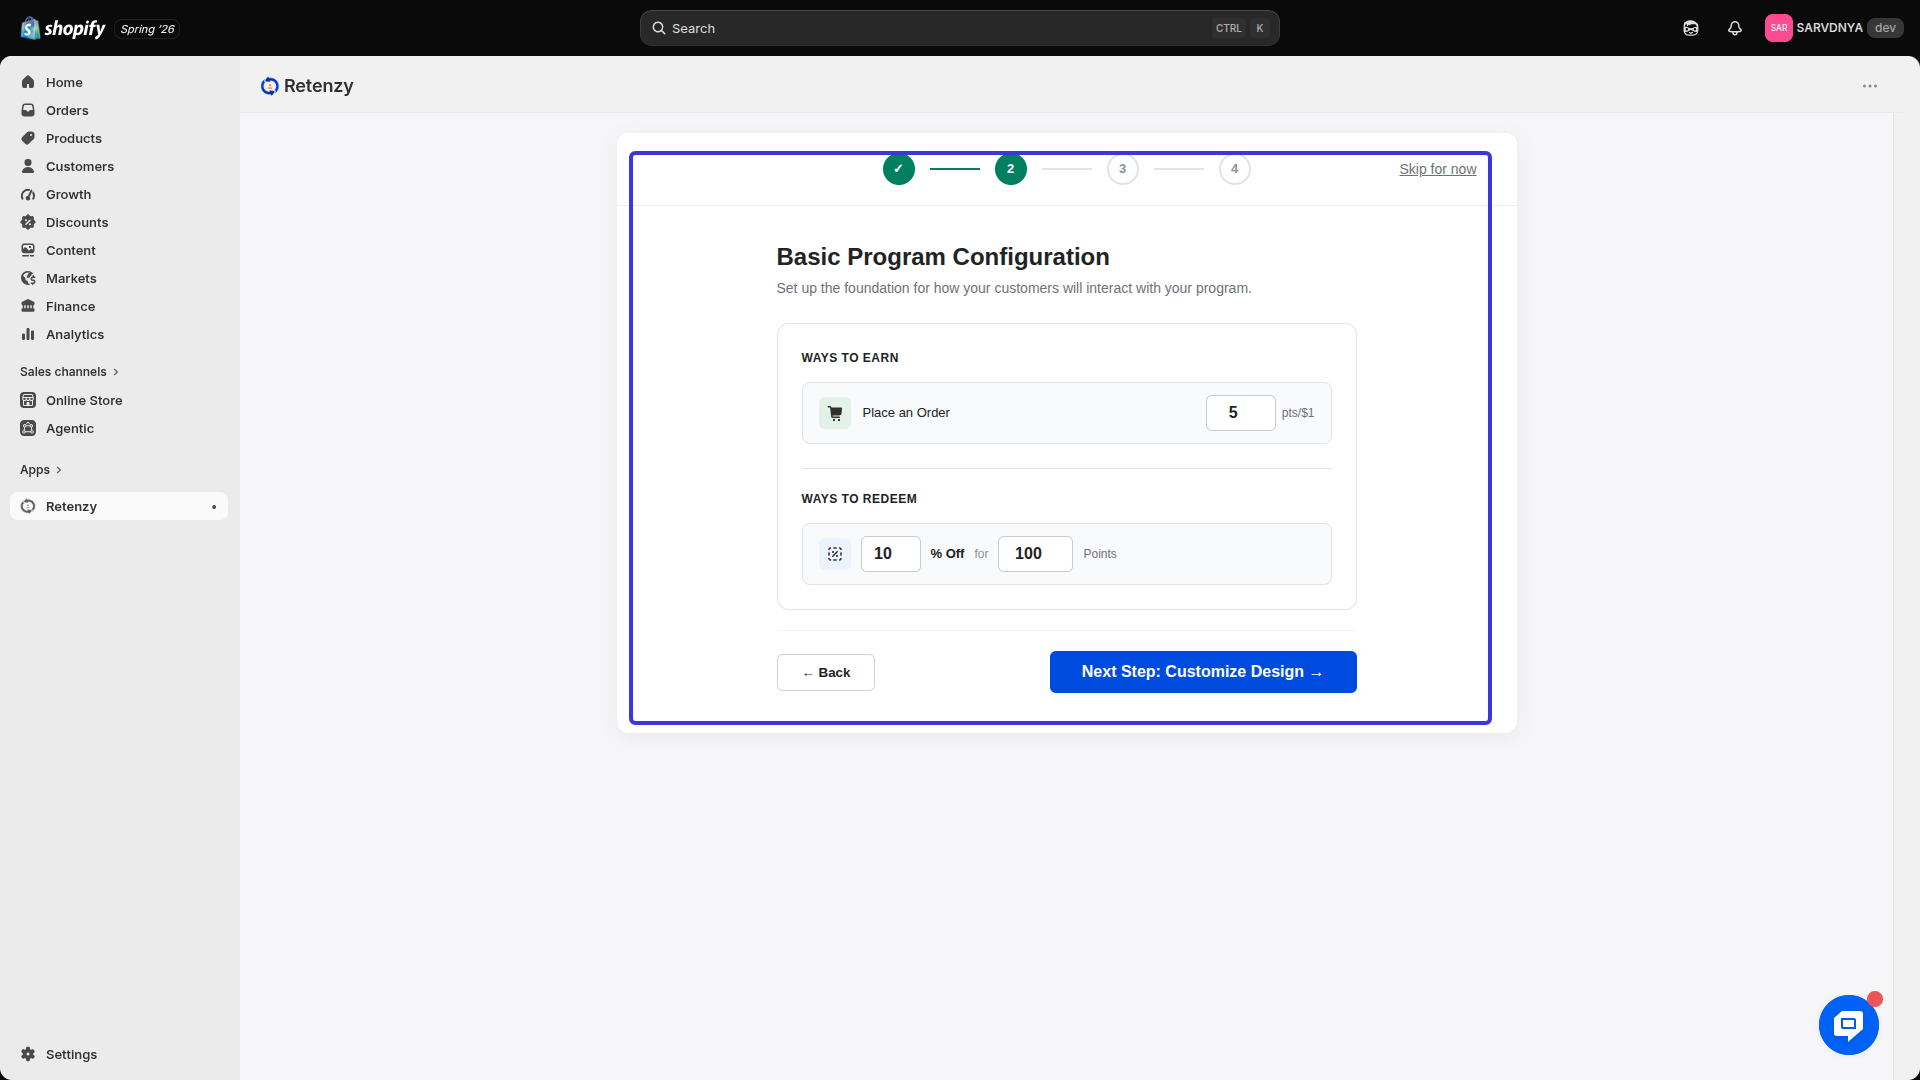
Step 3: Customize Your Widget Design
On the Custom Design page, personalize the appearance of your loyalty widget to match your store's branding.
Choose one of the available templates.
Template 1
Configure the following settings:
Box Settings
-
Brand Accent Color
-
Border Radius
-
Header Background
-
Body Background
Header Settings
-
Program Name
Content Settings
-
Overall Reward Points Text
Example:
You have {{points}} points.
-
Reward Milestone Points Text
Example:
Earn {{points}} milestone points on this order.
-
Place an Order Points Text
Example:
Earn {{points}} points on placing this order.
Template 2
Configure the following settings:
-
Brand Accent Color
-
Border Radius
-
Heading Background
-
Heading Text Color
Points Text
Example:
You have {{points}} coins.
Button Text
Example:
Apply
Unlock Text
Example:
UNLOCK
-
Card Background Color
-
Content Color
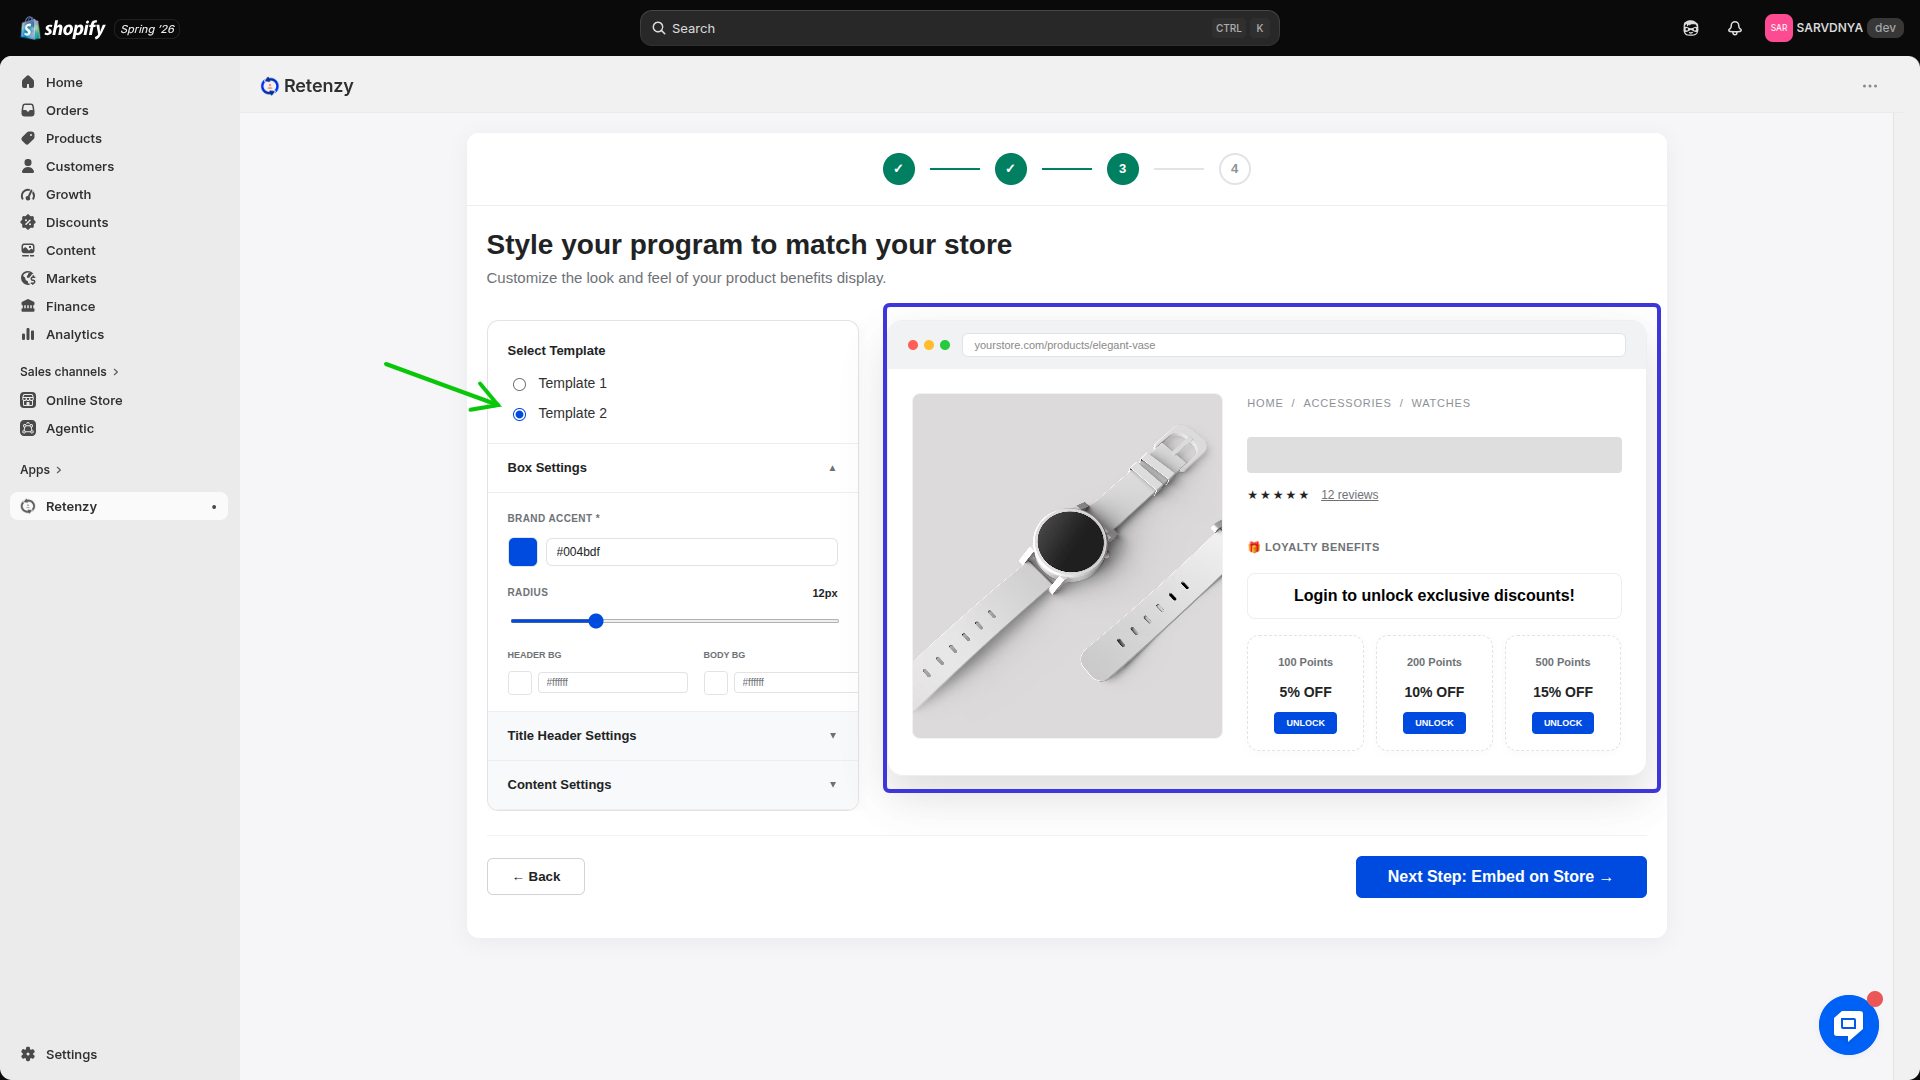
Once you have customized the widget, click Next Step.
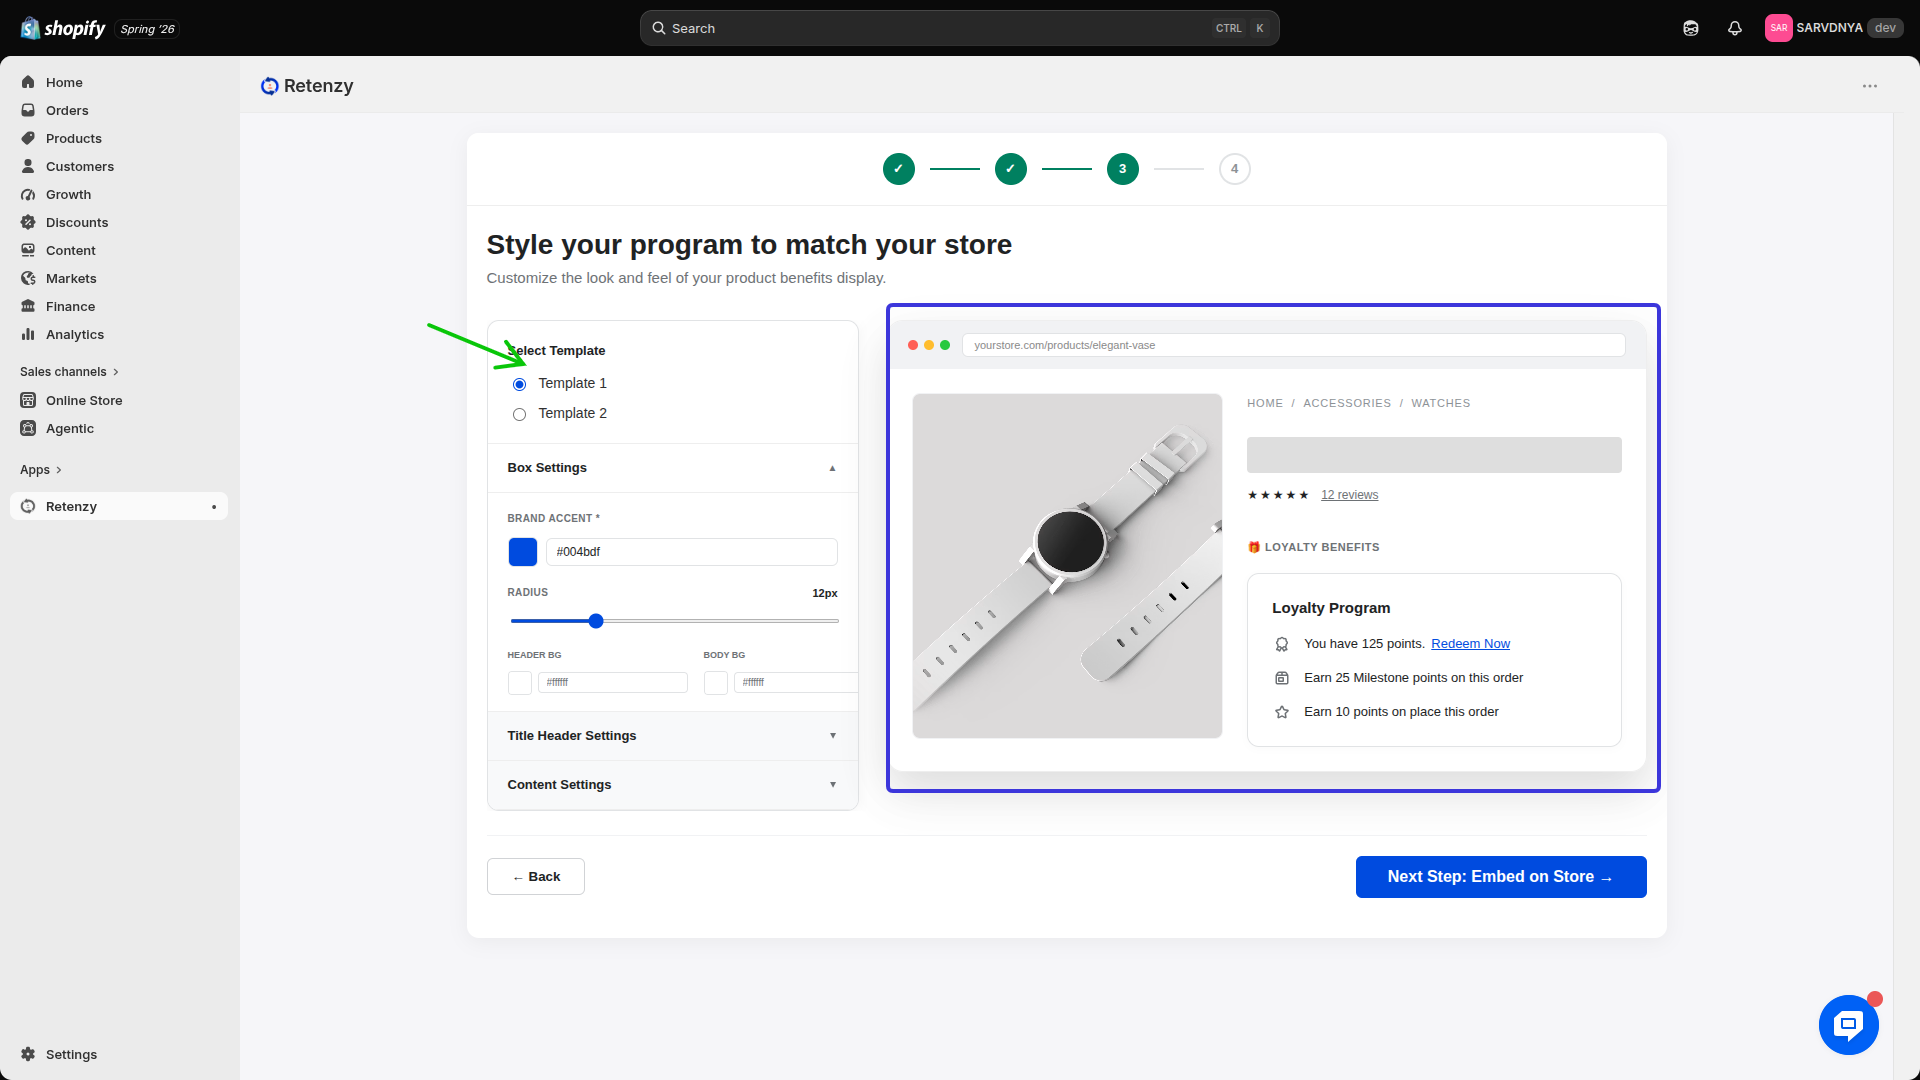
Step 4: Embed the Widget on Your Store
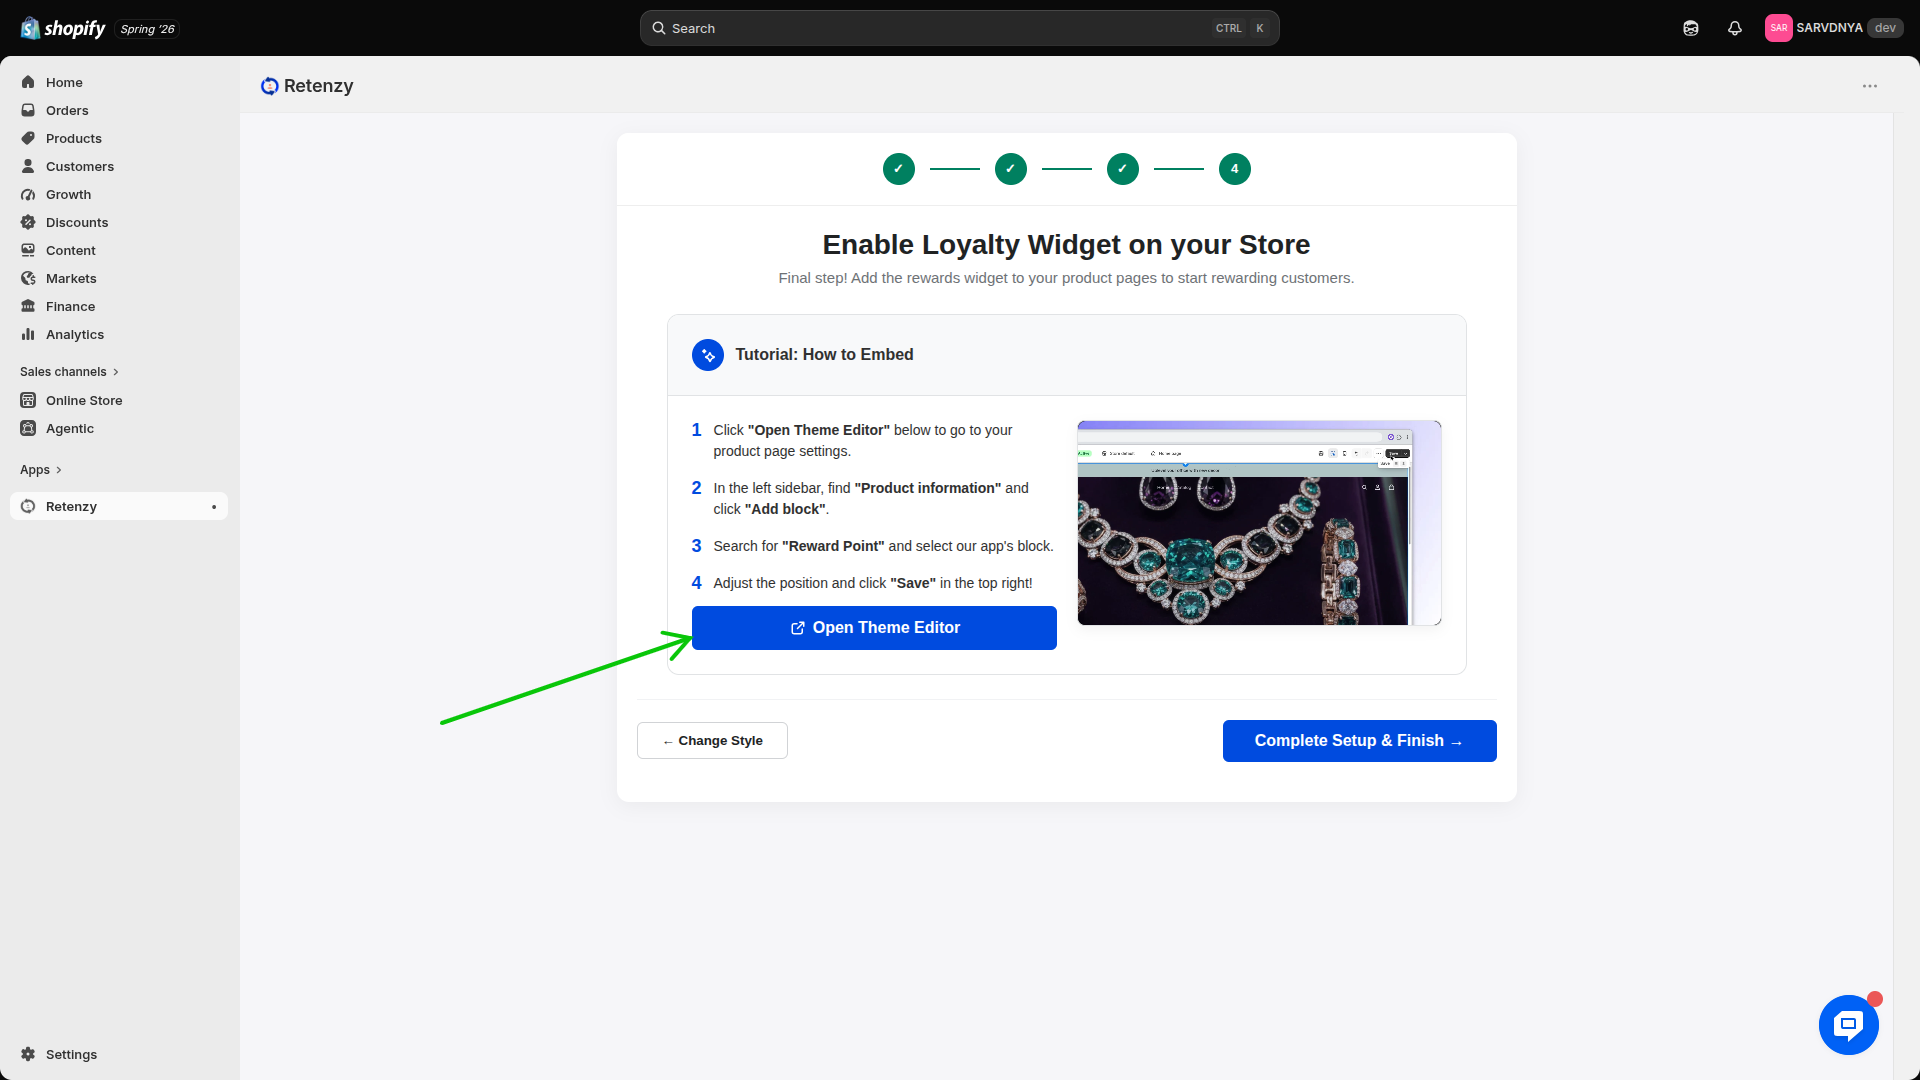
On the Embed on Store page:
-
Click Open Theme Editor.
-
Preview how the Retenzy widget appears on your storefront.
-
Make any necessary adjustments to ensure it matches your store's design.
Step 5: Complete the Setup
-
After verifying the widget in the Theme Editor, click Complete Setup & Finish.